

Getting Started with MkDocs: How to Build Your First Documentation Site
A Step-by-Step Guide for Beginners


Overview
Learning objectives:
- By the end of this tutorial, you will be able to build a documentation site using MkDocs.
This tutorial is for Technical Writers who are newly introduced to Docs-as-Code and need a guide to building their first documentation website.
What is MkDocs?
Technical writers can make websites with MkDocs, a simple and user-friendly documentation tool. It uses plain text written in Markdown and turns it into visually appealing documentation websites. MkDocs is also extensible, with many themes and plugins available. It's also easy to set up and use, making it ideal for technical writers who want to create high-quality websites quickly.
Benefits of Choosing MkDocs
MkDocs has the following benefits:
Simple to use: MkDocs uses Markdown, a simple-to-learn syntax language; you don't need any coding experience.
Focus on content: With MkDocs, setting up your project is easy, and it handles other technical aspects, allowing you to focus on creating your best writing piece.
Flexibility: It has several themes, with the option to customize your website to fit your brand style. It makes working with your team members easy, which is essential.
Before You Begin
You must have VS Code installed.
You must have Python and pip installed on your local device.
How to use MkDocs
Installation
MkDocs requires Python, a programming language, but do not fear; you do not need to learn Python to build your first documentation site.
If you already have Python installed, confirm by writing the following command in your terminal:
  python - -version
  Then
  pip --version
If something like this occurs, then you are good to go.
The number may vary depending on the latest version the Python developers team releases.
  PS C:\Users\Administrator> python --version
  Python 3.11.4
  PS C:\Users\Administrator> pip --version
  pip 23.1.2 from C:\Python311\Lib\site-packages\pip (python 3.11)
Setup
Now that you have Python and pip installed, the next step is to install MkDocs. Follow the steps below.
Type this command in your terminal or command prompt:
pip install mkdocsConfirm the complete MkDocs installation by typing this command:
mkdocs --versionCreate a new folder for your project on your desktop.
Right-click on the newly created folder and choose 'Show more options'.
Click 'Open with Code' to open your VSCode.
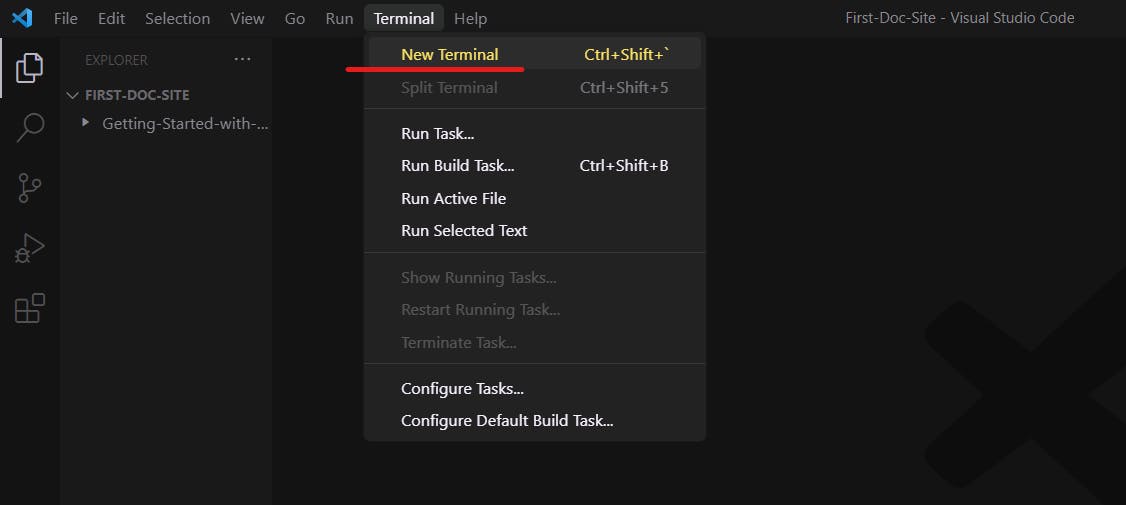
Click on the terminal and select 'New Terminal'.
Create a new MkDocs project by typing in the command below in the opened terminal.
mkdocs new my-project // ‘my-project’ can be any nameNavigate to your new project folder by typing the following command:
cd my-project
Understanding the MkDocs project Structure
When you type the commandmkdocs new my-project, it creates some files automatically.
Here is a breakdown of those files and what they are for:
docs/is a folder containing all your project's content. It has markdown (.md) files; It is mandatory to write in Markdown. Markdown is a markup language that is easy to learn and represents individual pages on your site. This folder can have folders created in it.mkdocs.ymlis a vital file. MkDocs receives instructions from here. You can change the site name, add pages, add themes, and much more. Every significant change you make to your project must be in this file.
Writing
Using MKDocs is easy—you don't need coding experience. All your content is in the Docs folder.
Getting Started
To get started, type this command in your terminal.
cd my-project // Use the name for your projectFor a preview of your site, start the server by running the command
mkdocs serveClick on ‘Ctrl’ +
http://127.0.0.1:8000/to view the default web page.

Making Changes
To make some changes to your site, follow these steps:
Heading
- Change the site name in the
mkdocs.ymlfile and save your changes.
- Change the site name in the
site_name: First Doc Site
Adding pages
Navigate to the
docs/folder and create new files, for example,firstpage.mdandsecondpage.md. See How to Create Files and Folders in VS Code for more information.Type in your content using Markdown. For more information, see markdown syntax.
Save your work.
Go to
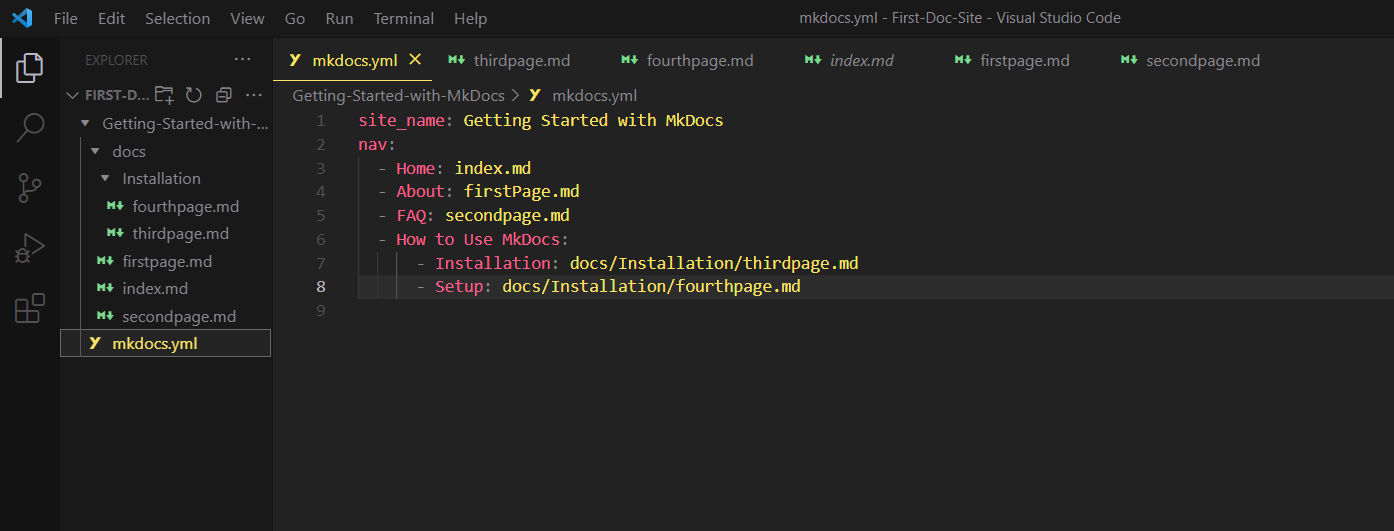
mkdocs.yml, add the newly created files in this format, and save your changes.
    site_name: Getting Started with MkDocs
    nav:
      - Home: index.md
      - About: firstPage.md
      - FAQ: secondpage.md
Nesting
This is grouping pages under a parent page; this makes your site organized and easy to navigate.
Create a new folder in the
docs/folder; this will be the parent page.Create new markdown (.md) files in the new folder and add the content or text on these pages.
Open the
mkdocs.ymlfile under thenavsection and add the parent page and its sub-pages in the format below.Remember to indent your YAML file
How to use MkDocs themes
MkDocs offers a range of themes for customizing your site. With these themes, you can change the look and styling of your site. They are
Built-in themes include the default MkDocs, which does not require installation, and Read the Docs. Follow the steps to use the Read the Docs theme:
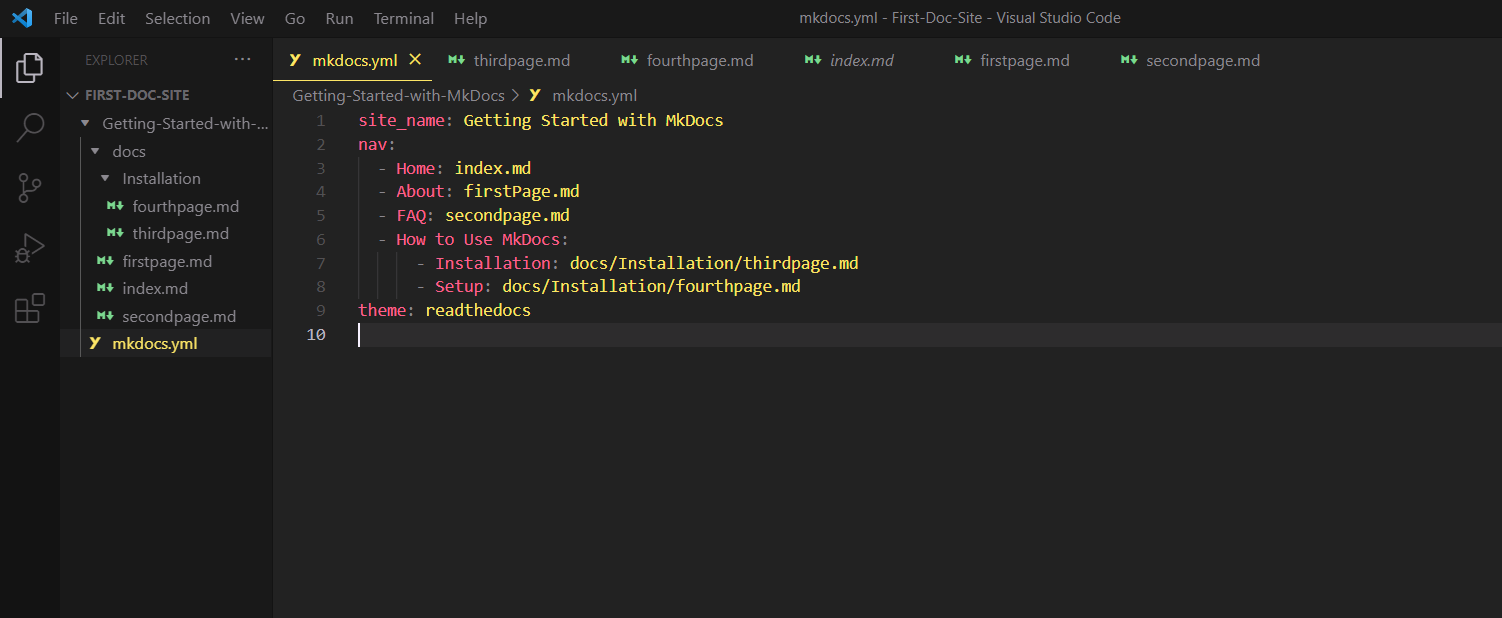
Open the
mkdocs.ymlfile, type intheme, and set the value toreadthedocs.theme: readthedocsSave the changes in the
mkdocs.ymlfile.
External themes offer additional customization options and styles. Follow these steps to get started:
Find an external theme on GitHub and install it according to the instructions in the documentation.
In your
mkdocs.ymlfile, type intheme:[themeName]Explore the customization options of your preferred theme.
Building and Deploying Your Site
This process makes your MkDocs site live and accessible to people. To get started:
Create a GitHub account on the website.
Create a new repository on GitHub. For more information, see Create a Repo.
Push your site to this new repository by typing these commands after each other in your terminal.
  git init
  git add . //Ensure to add a space after ‘add’
  git commit -m "First commit"
  git remote add origin https://github.com/DrVickie8/MkDocsTest.git
  git push -set-upstream origin master
Type in your terminal and wait for a few seconds
mkdocs gh-deployCreate a new file called
.gitignore, add the newly created foldersiteas seen below and save changes.Your
first-projectis the name of the folder thesitefolder is in.Repeat the commands below.
  git init
  git add .gitignore //Ensure to add a space after 'add'
  git commit -m "Fix: Adding .gitignore file"
  git push
Go to your GitHub repository and refresh the page.
Scroll down to the ‘Environment’ section and click ‘github-pages'
Click ‘View deployment’, and your MkDocs site is now available.
Here is a link to a GitHub repository and documentation site used to deploy a MkDocs site created following the instructions in this guide.

Note
When you want to make changes to your site, you will delete the
gh-pagesbranch by using thegit push origin --delete gh-pagescommand in your terminal.After you have made the changes, delete the
sitedirectory and typemkdocs gh-deployto deploy the site.
CONCLUSION
Throughout this tutorial, you gained the necessary skills to set up a MkDocs project and comprehend its structure. Additionally, you learned how to add and organize pages, customize your website with themes, and deploy it on a hosting platform.
Utilizing this newfound knowledge, you have successfully built your documentation site. It is recommended that you continue to explore other documentation sites to improve your understanding.
Staying up-to-date with the latest tips and techniques is crucial to enhancing your writing skills. As such, I highly encourage you to connect with me on LinkedIn and Twitter.